Custom Fields
Custom fields
If you're looking to add some extra data to your content in a more structured way, then you're in the right place! Outstatic has an awesome feature called custom fields that makes it super easy to do just that.
Steps to add custom fields:
Step 1: Access the Add Custom Fields Page
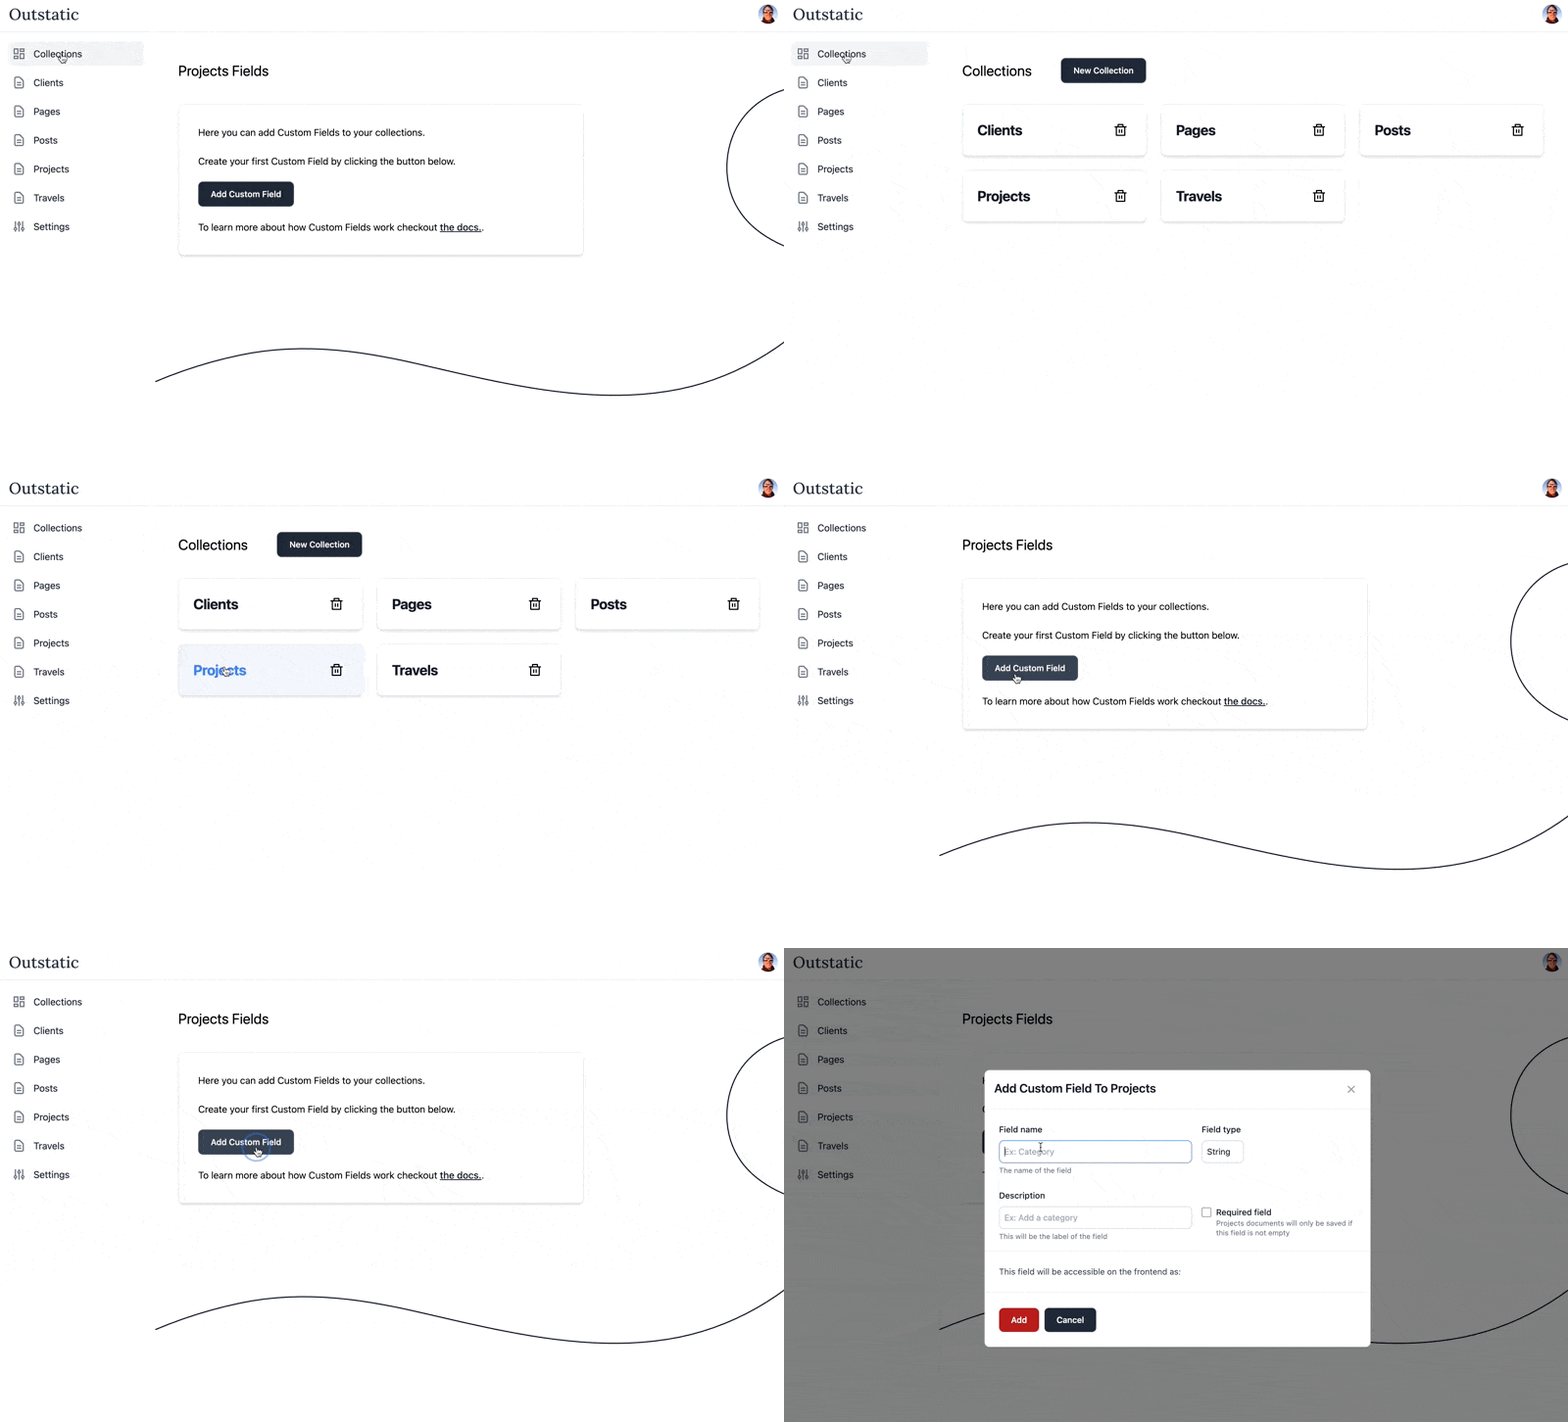
 First, head over to the Collections page and click on the Collection you want to add custom fields to.
Step 2: Create a new Custom Field

Once you've selected your Collection, click the Add Custom Field button. This will bring up a modal with a few options for you to fill out.
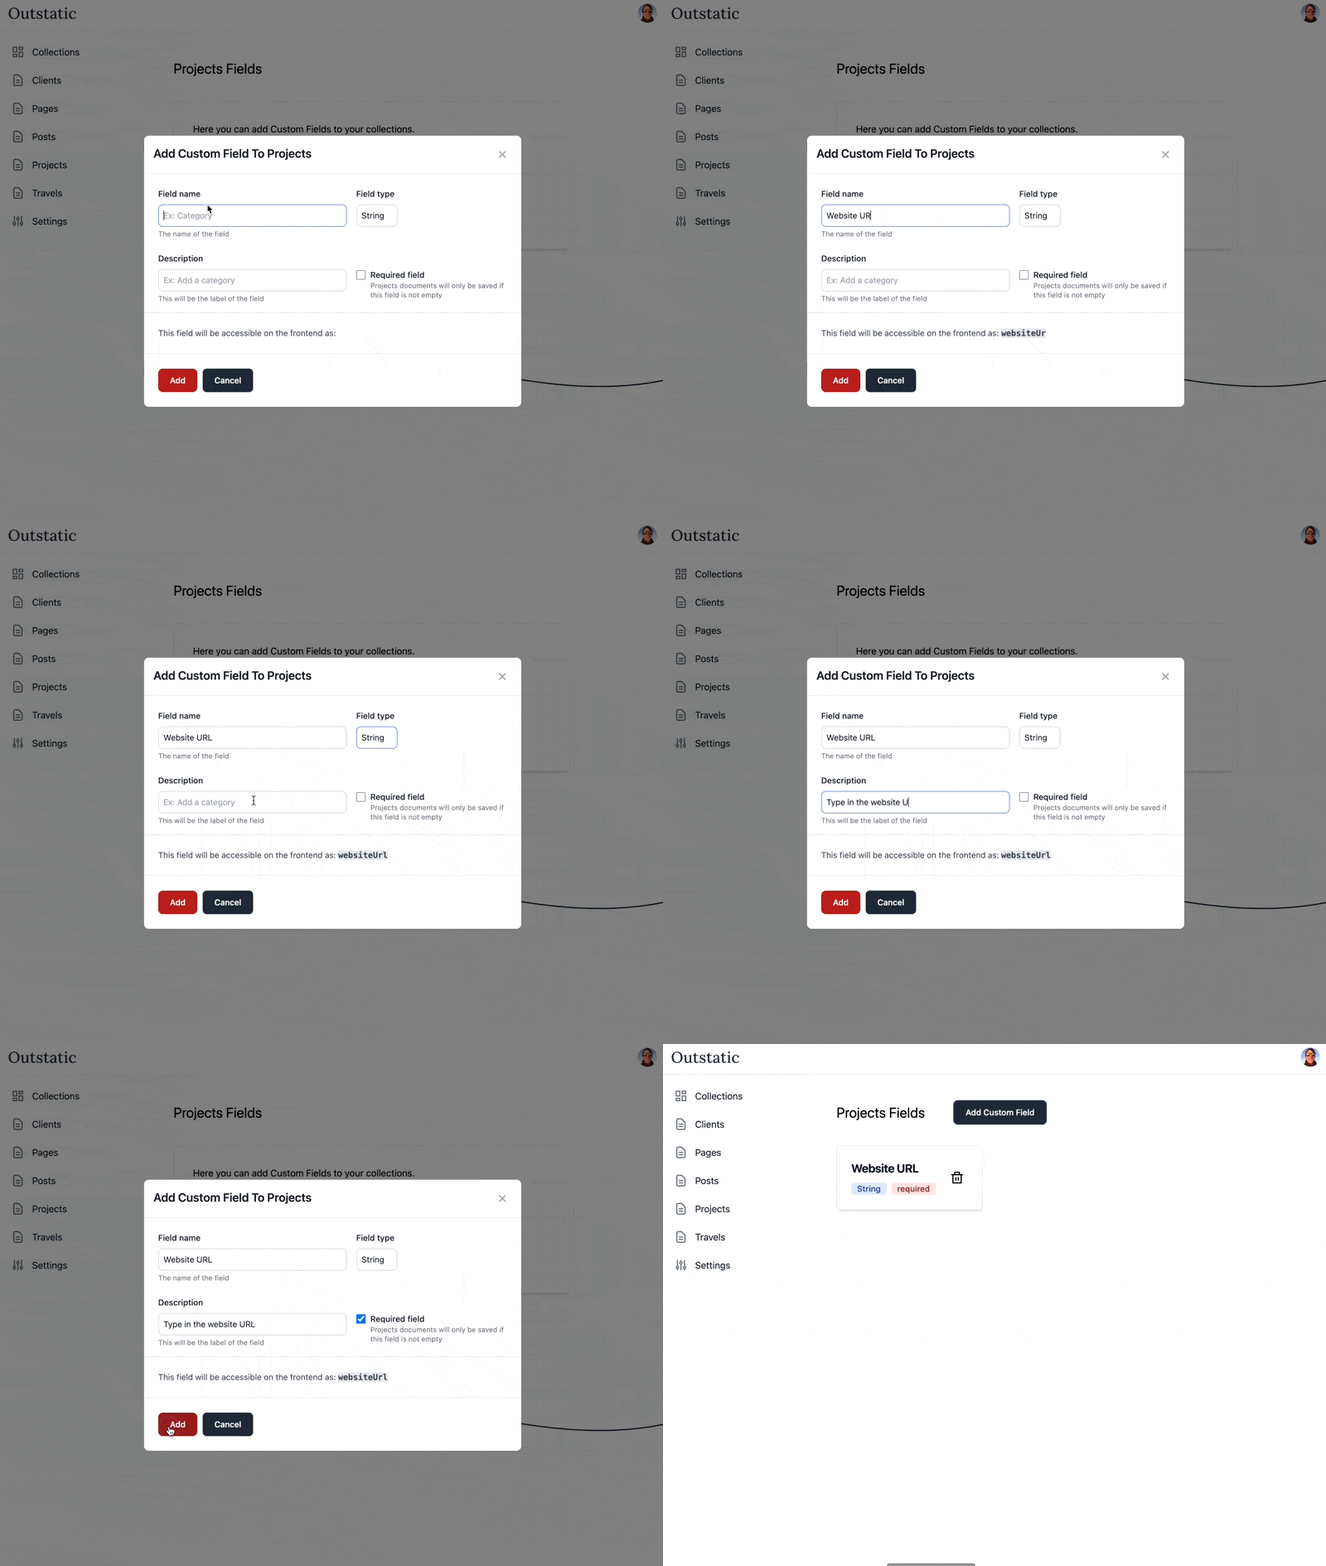
Field name: Enter the name of your custom field in the "Field name" section. This will be the name of the field that appears on your Document.
Field type: Choose the data type that you would like the custom field to be in the "Field Type" section. For example, you might choose "string".
Description: You can add a brief description of the field in the "Description" field. This is a good place to provide context for the field and explain how it should be used.
Required field: If you want to make the custom field mandatory, select the "Required Field" checkbox. If someone tries to save a document without filling in this custom field, they will be prompted to enter data into this field before the document can be saved.
This field will be accessible on the frontend as: Outstatic will generate a camel case id based on the field name. This is how the field will be stored in your Markdown files and you should use this id to fetch data from the frontend. Check out the Fetching data section of the docs to learn more.
Step 5: Save the custom field Finally, save your new custom field by clicking the "Add" button in the custom fields interface. Once saved, the custom fields will be available for use on the selected collection documents.
Once saved a new field will appear in the Editor Settings:

Editing Custom Fields

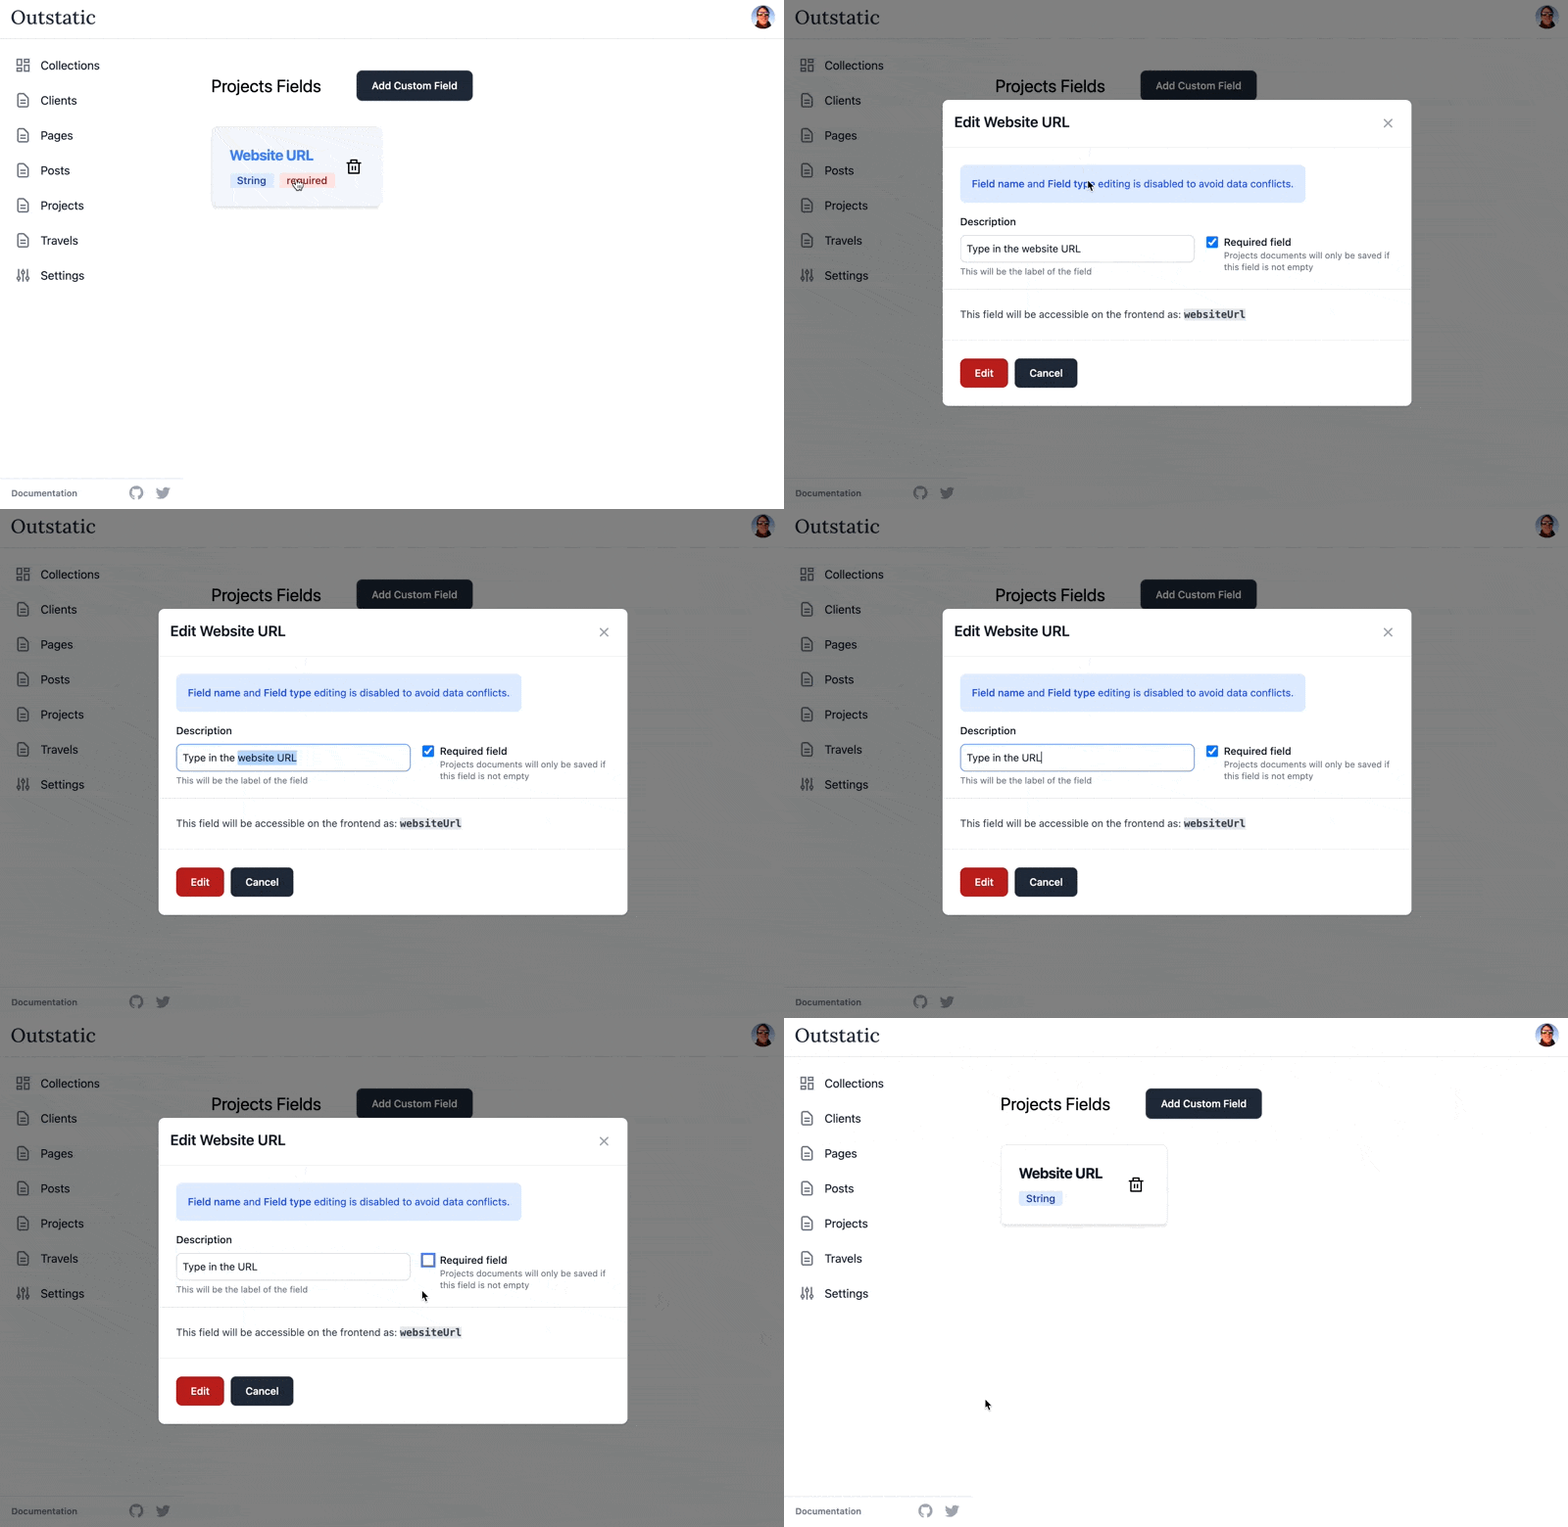
Editing is limited to the Description and Required fields. To avoid conflicts with already saved data, you will not be able to edit the Field name or Field type.
You can change the field's label and if it is required.
If your editing a Tags field, you can also delete tags.
Just click on the field you want to edit, make your changes, and hit Edit.
Deleting Custom Fields

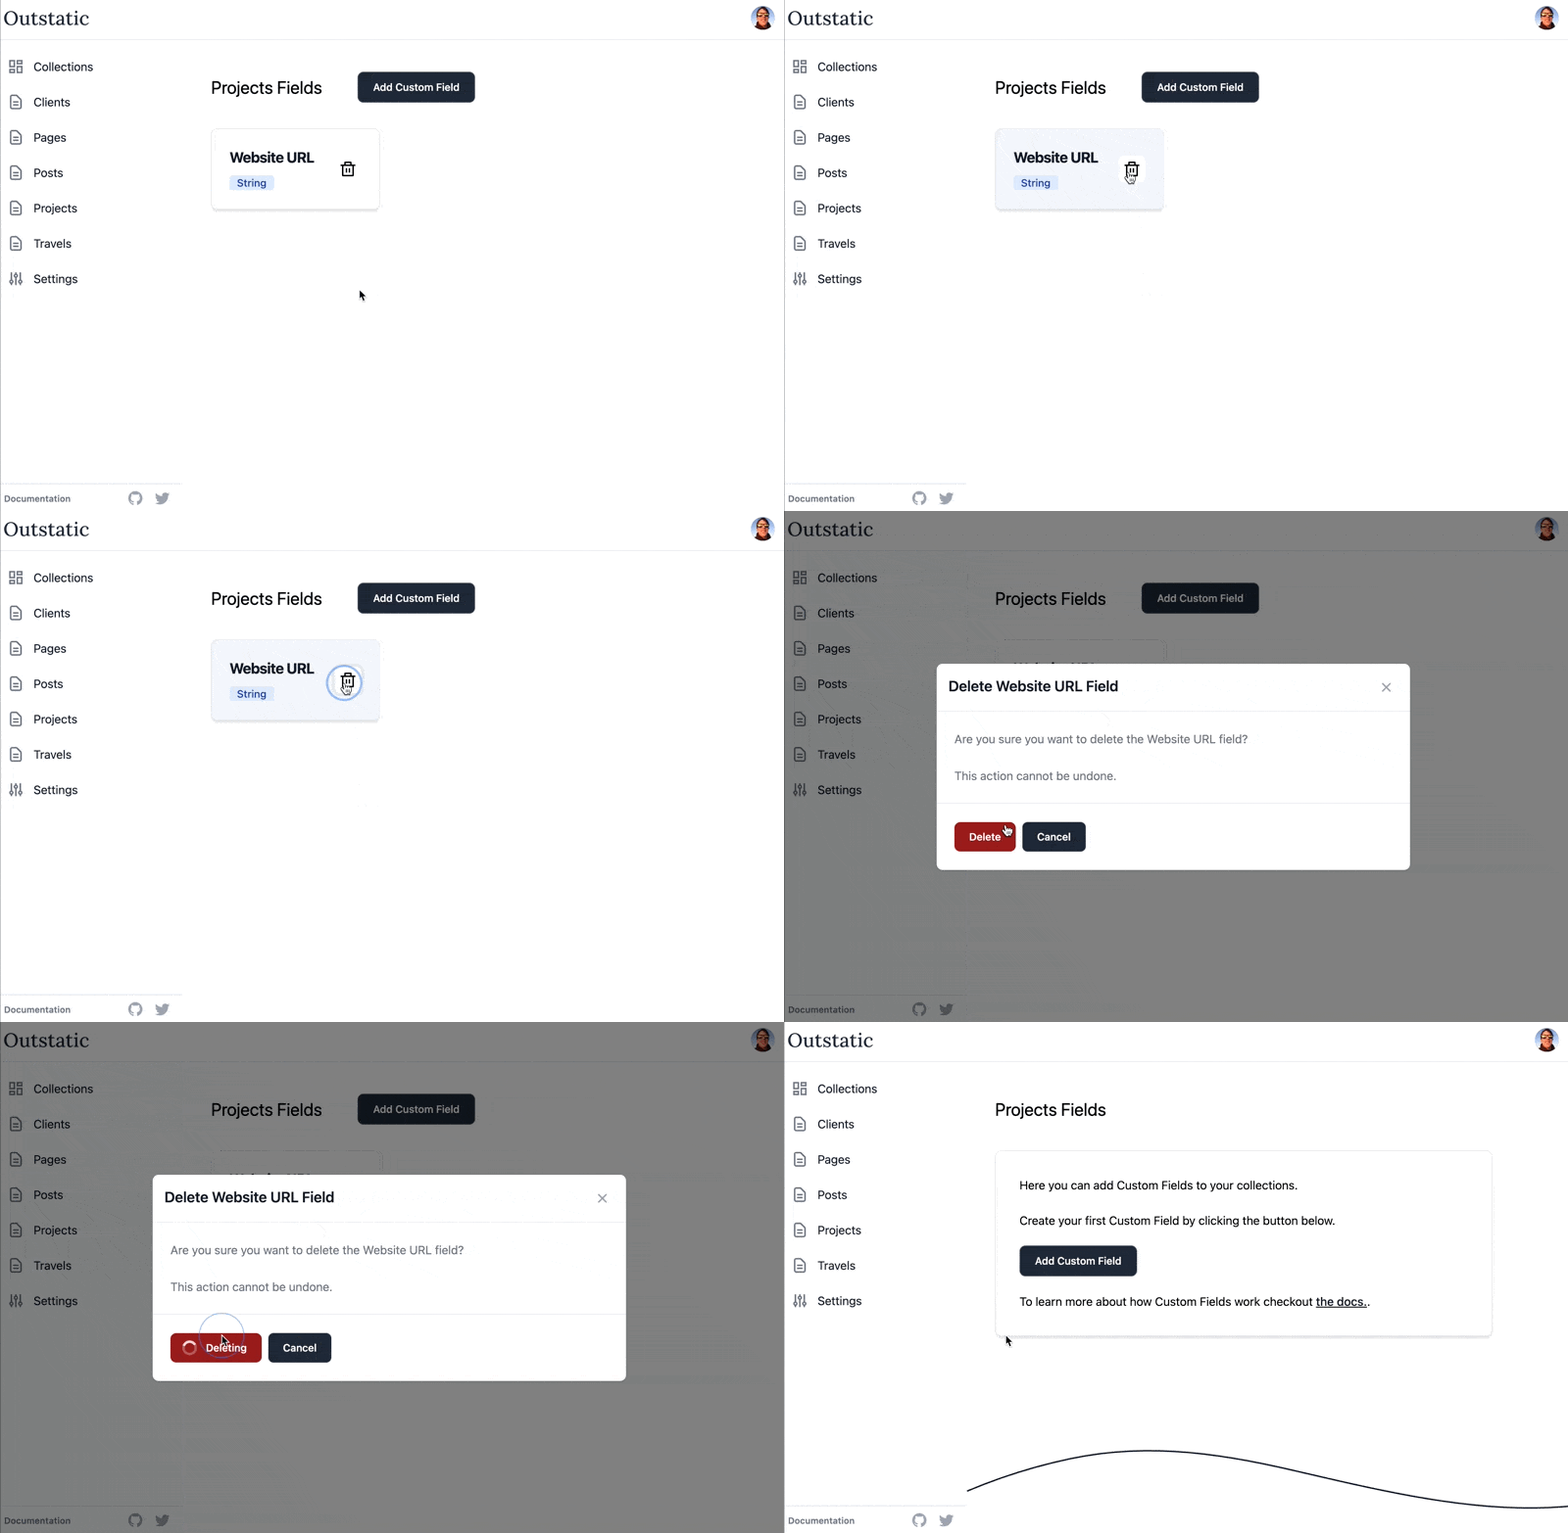
To delete a field, simply click the trash icon next to the field you want to remove.
Important: deleting a field does not remove the metadata from your Markdown files.
Good to know
Fetching Custom Fields
Custom fields will be unique to a collection, but metadata queries will operate across all collections (and should be narrowed by collection if you care about a specific collection's custom fields). To learn more about how to fetch collection specific data read the Fetching data section of the docs.
How are Custom Fields stored?
Fields are stored under /outstatic/content/{collection}/schema.json.
Example schema.json file:
{
  "title": "projects",
  "type": "object",
  "properties": {
    "websiteUrl": {
      "required": false,
      "description": "website url",
      "fieldType": "String",
      "dataType": "string",
      "title": "website url"
    },
    "websiteSummary": {
      "required": false,
      "description": "Summary",
      "fieldType": "Text",
      "dataType": "string",
      "title": "website summary"
    }
  }
}
json
Conclusion
Overall, custom fields are an awesome way to extend your content with additional structured data. By following these steps, you'll be able to create custom fields and start using them in no time!